User
This tutorial will walk you through the steps of adding, editing and deleting users.
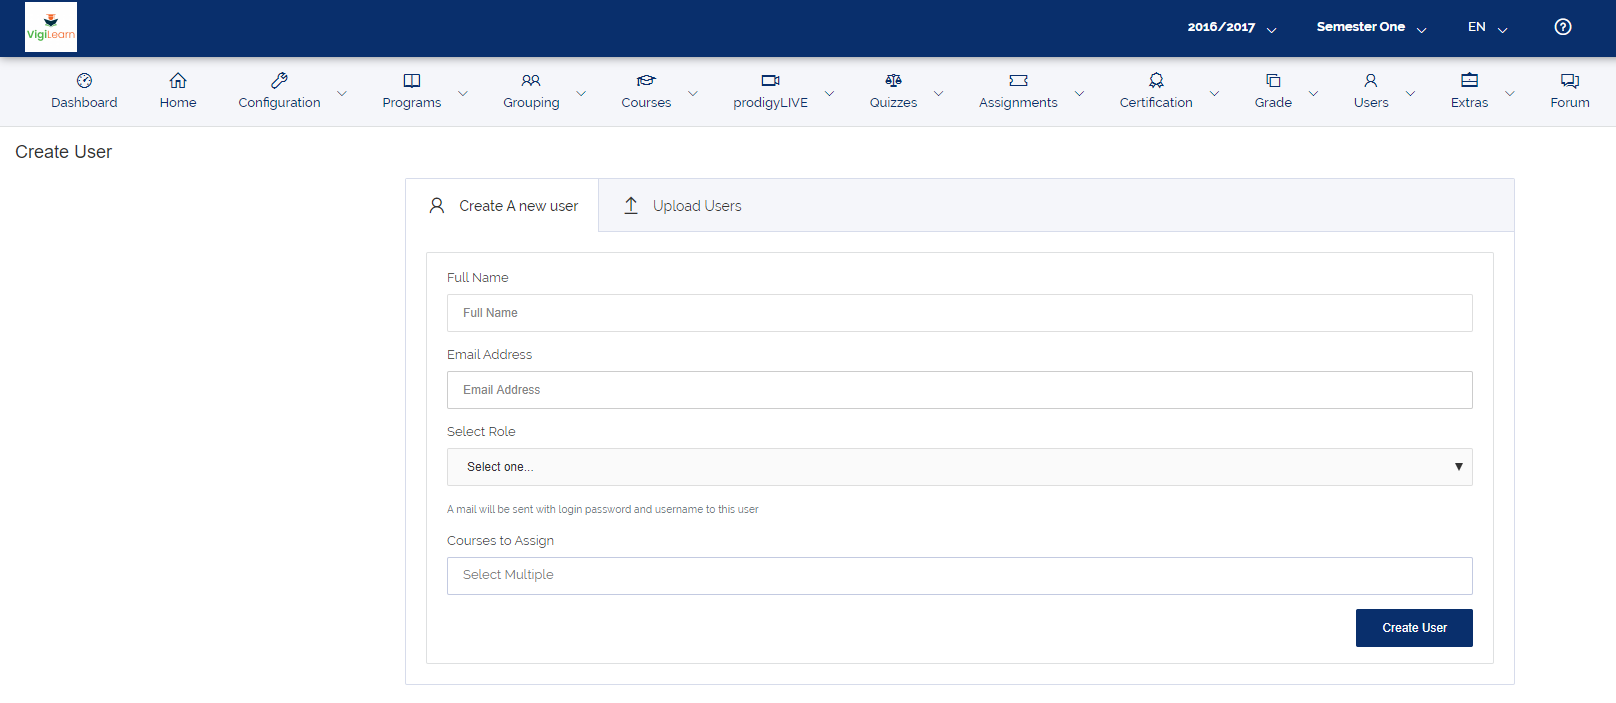
1. Add User
To add a new user to the platform, on the MENU simply click Users > Add Users. it takes you to the page where you fill
the user's details such as Full Name, Email Address, Role of users and Courses assigned to the User. Click Create User to add the new user.
2. User List, Edit and Delete User
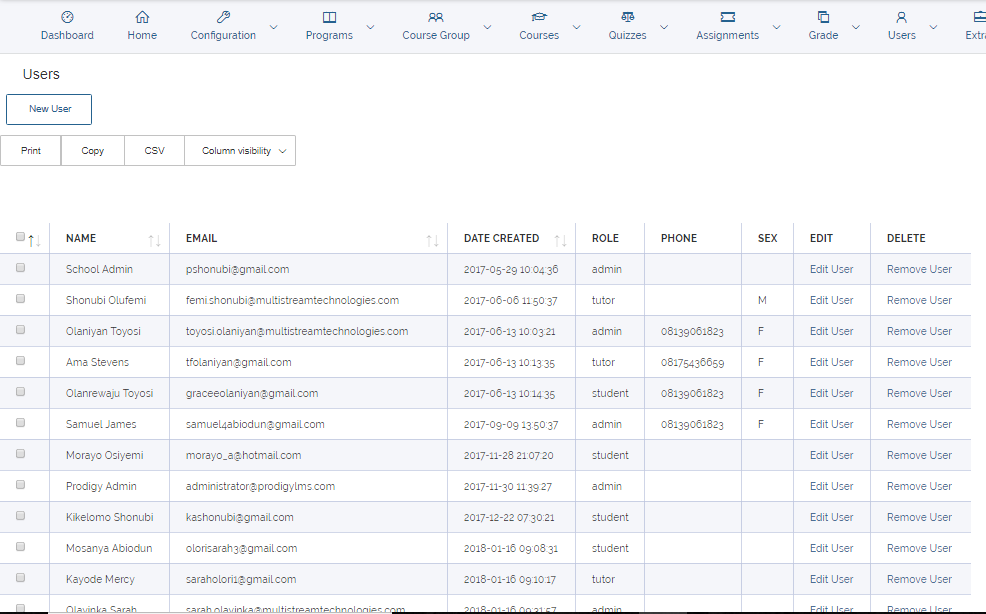
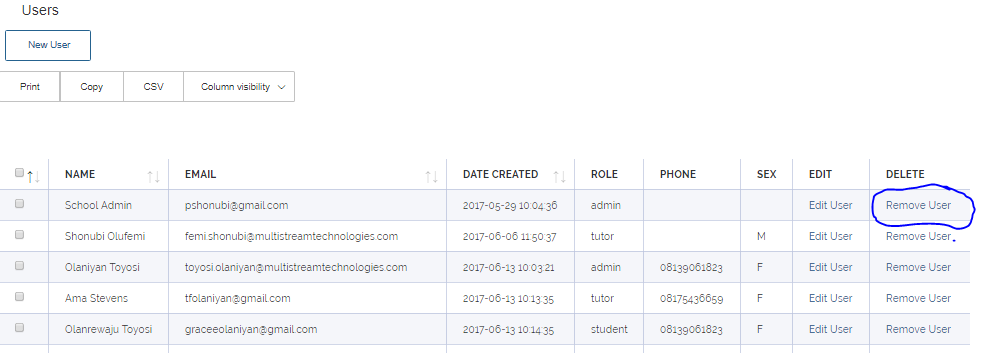
List Users
To see the list of all available users, on the MENU simply click Users > All Users , you can get the names of all users of the platform,
their email address, the date their account was created, their Role, Phone Number and sex.
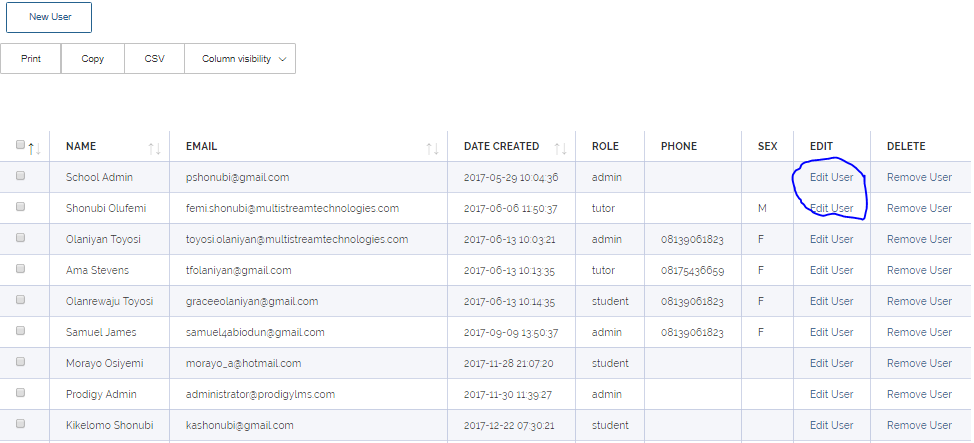
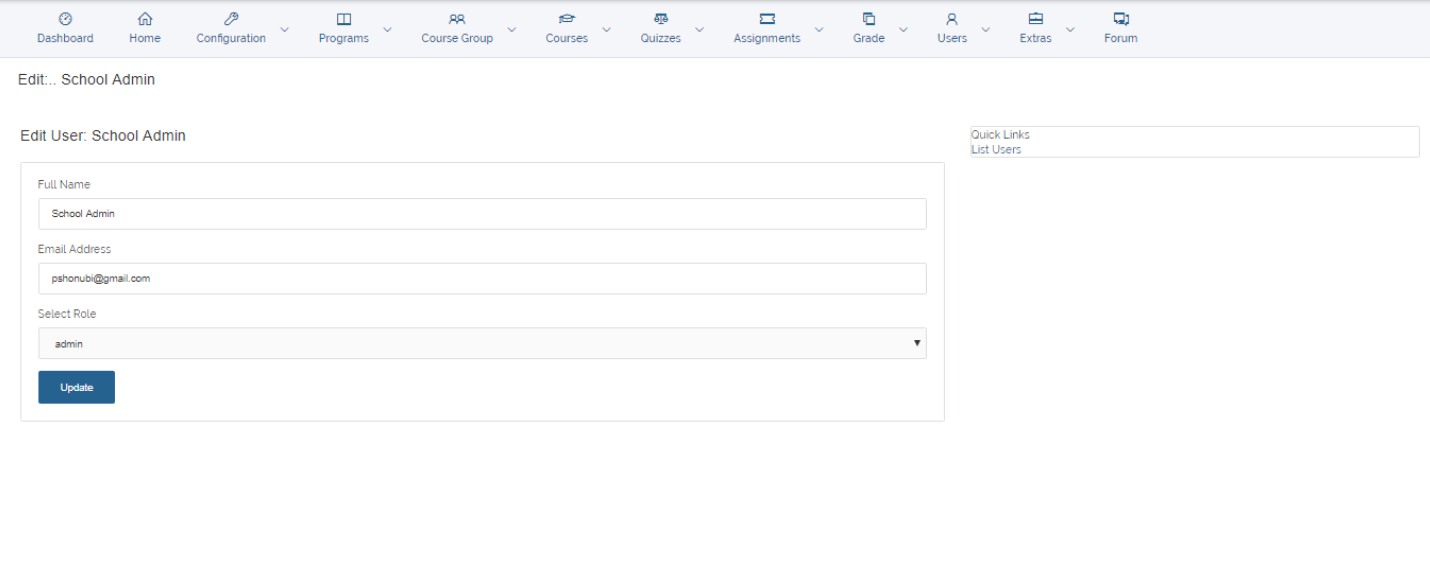
Edit Users
On the same page, an Admin can edit the the detail of any student. On the all Users page, click on Edit which takes you to the page where you can edit details.
Click Update after editing to effect changes.
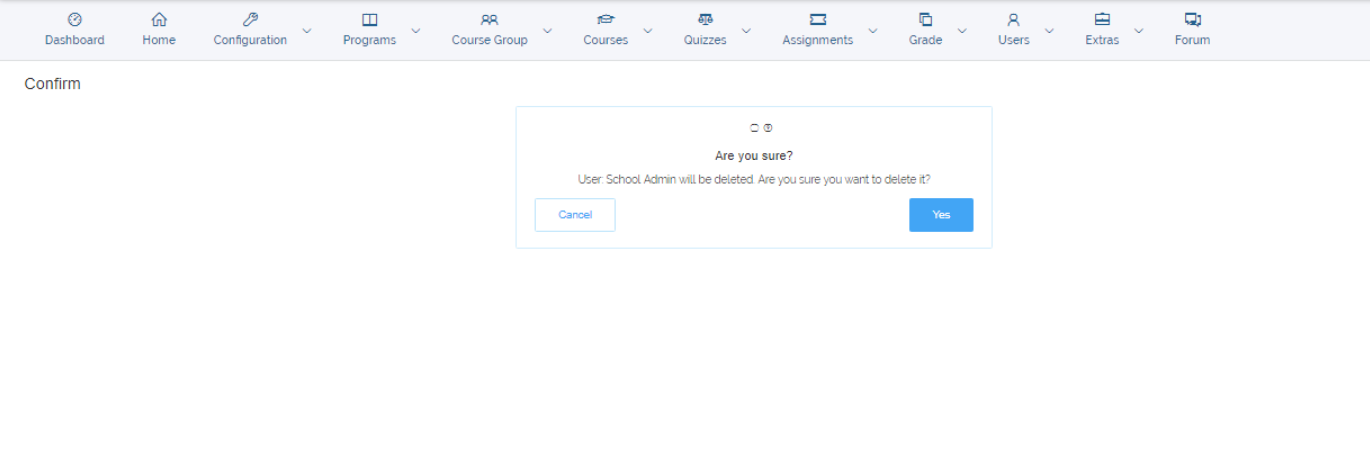
Delete Users
On that same All Users page, there are delete button that come as a column with user details, Click on Delete, it would ask for a confirmation to delete or cancel request.
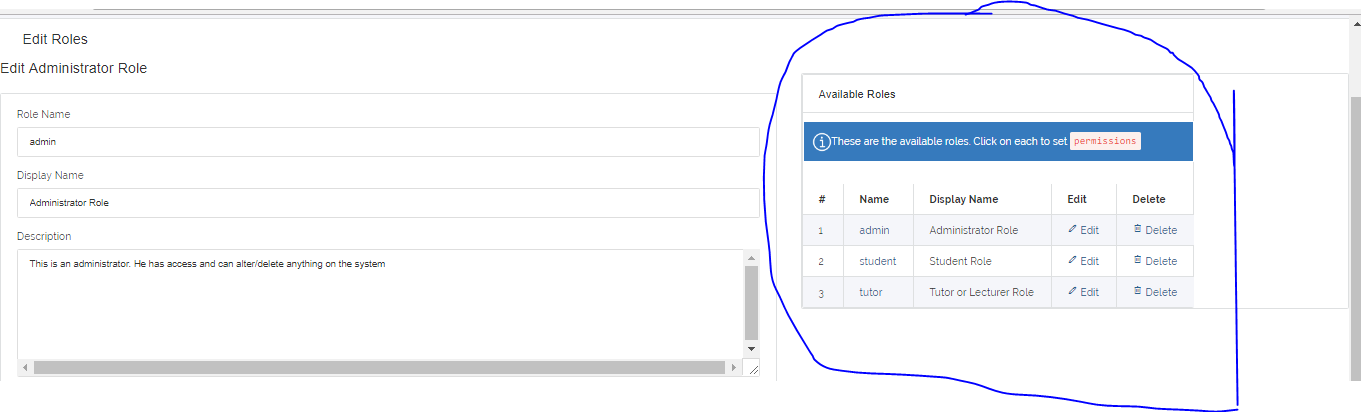
3. Roles and Permission
This feature allows an administrator to create a new role asides the Admin,Tutor and Learner privileges. It also allows the Admin choose what the new role
would have access to.
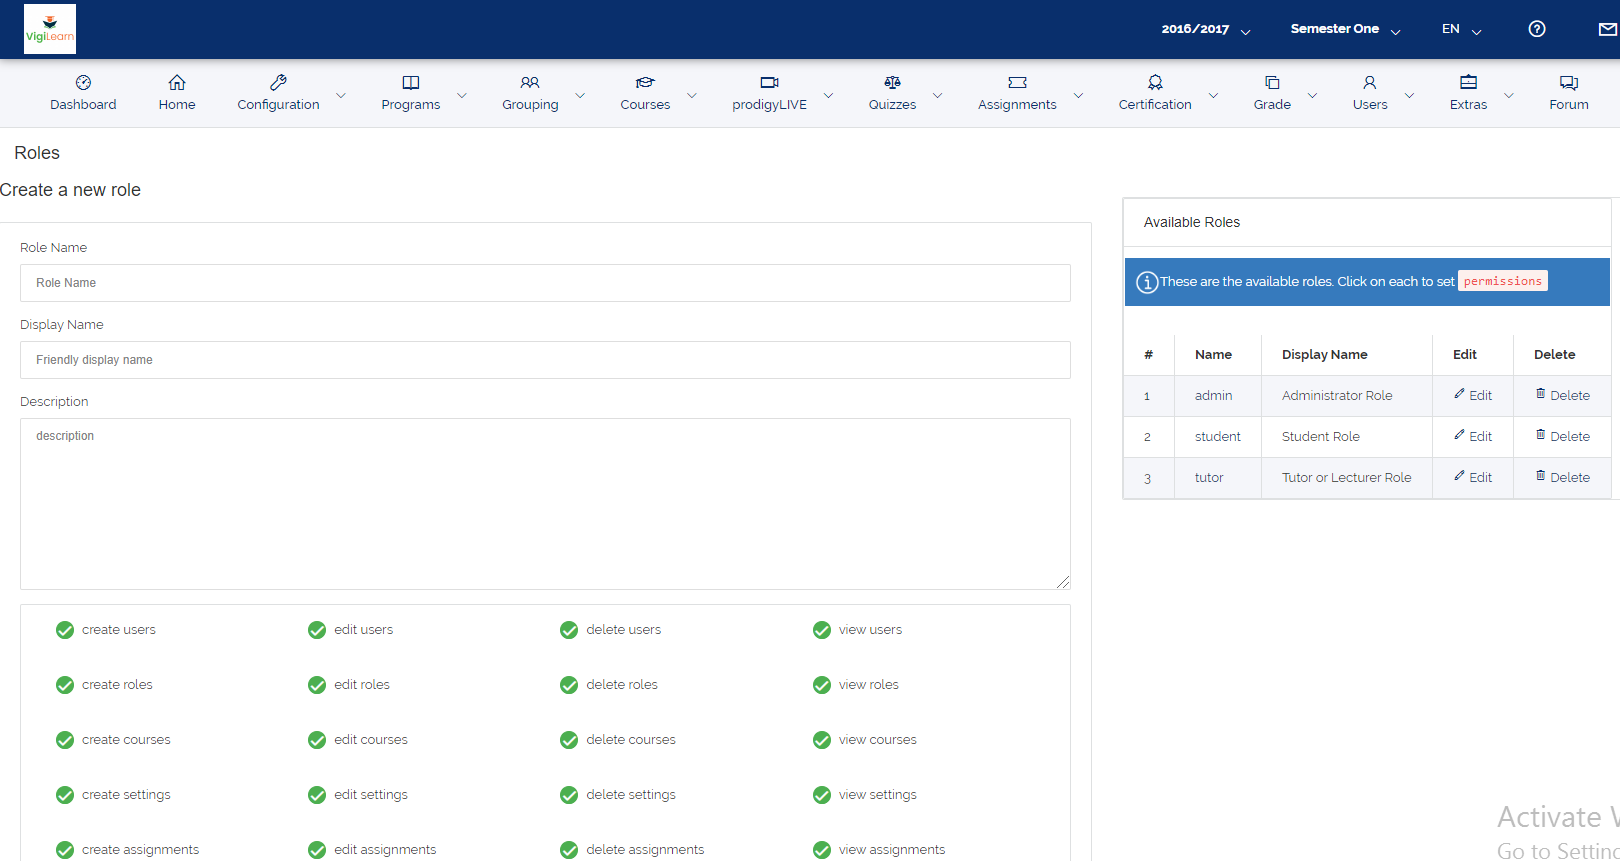
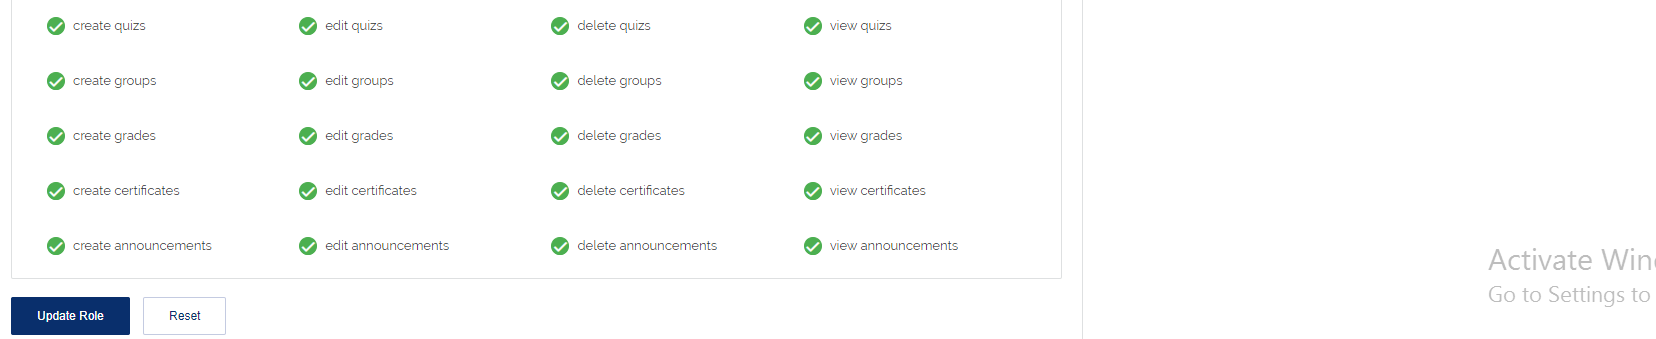
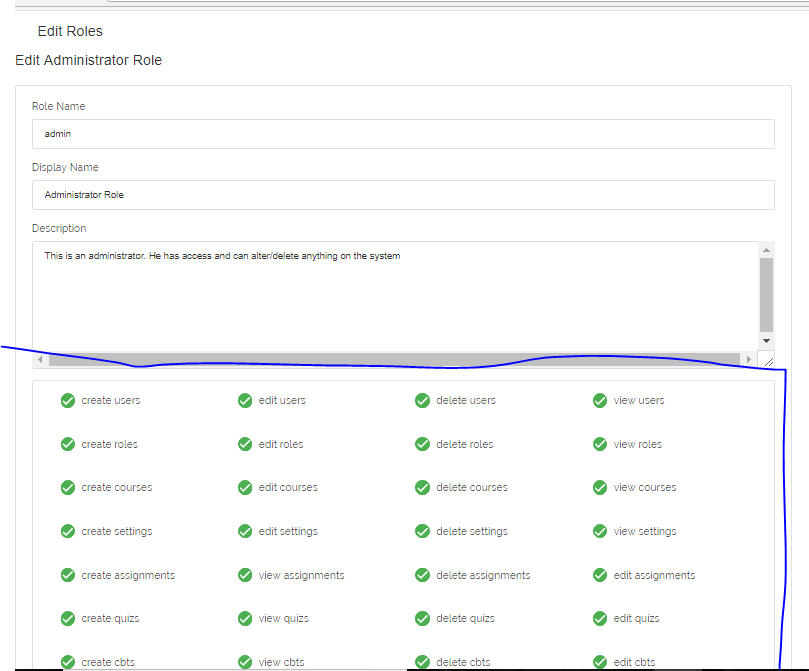
As an admin, you can decide to edit permissions of a user or delete the role.